Let’s start with the most obvious one.
1. How to Upload images in WordPress?
WordPress makes it super easy to upload images to your posts, pages, and non-content areas like sidebars.
To upload images in WordPress posts and pages, you simply need to add the image block to the content editor.
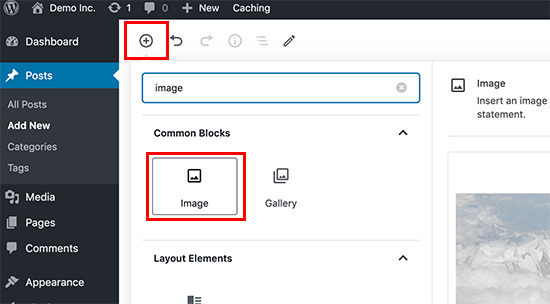
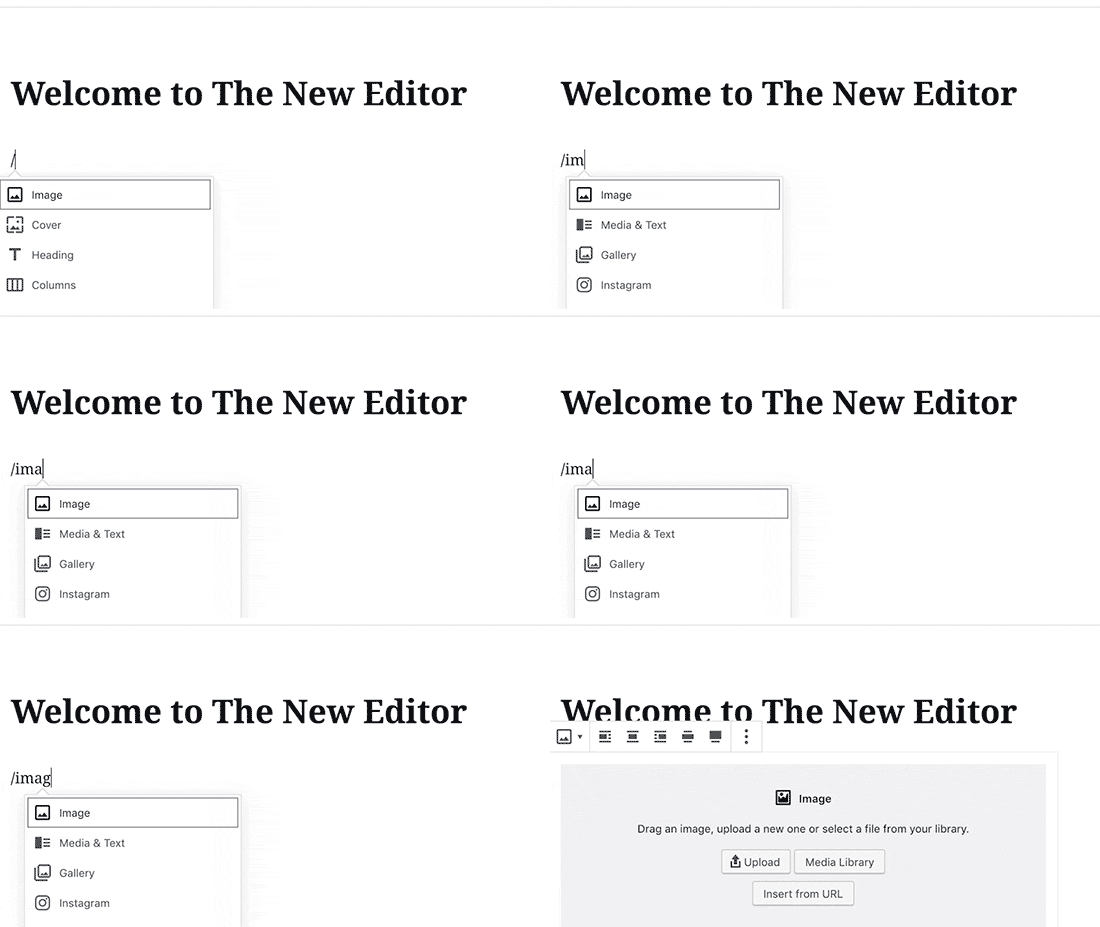
You can also add the image block by simply typing /image in a paragraph block. The editor will start showing blocks you can insert as soon as you start typing.
WordPress will now add the image block to the editor. You need to click on the ‘Upload’ button to select and upload the image from your computer.
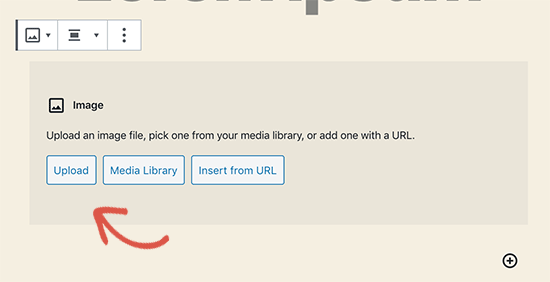
You can also select a previously uploaded image from your media library.
After uploading the image, you’ll see a live preview of the image in the content editor.
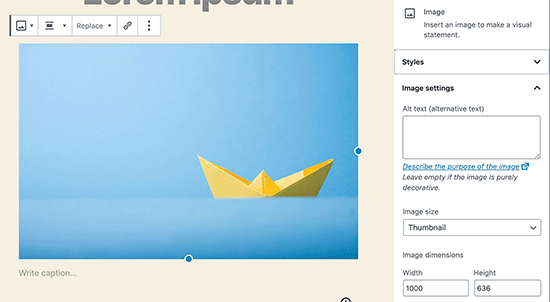
You’ll see a bunch of image settings on the right panel. From there you can provide image alt text, select image size, and image style.
2. How to Align Image to the Left or Right in WordPress?
WordPress makes it easier to align images to the left, right, or center. Simply select the image by clicking on it, and then click on alignment button from the block toolbar.
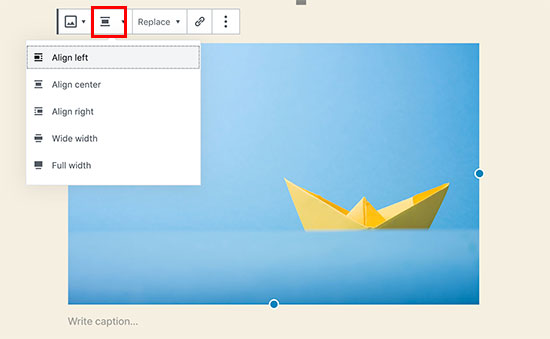
You may have noticed how some popular blogs use images with text wrapped around them. This is done by using the align feature.
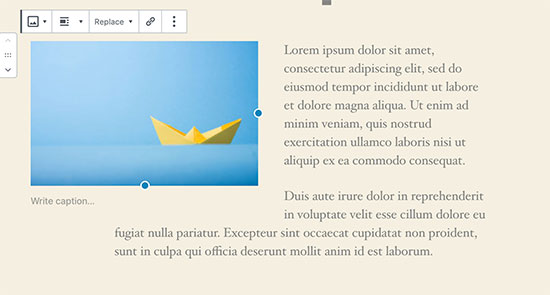
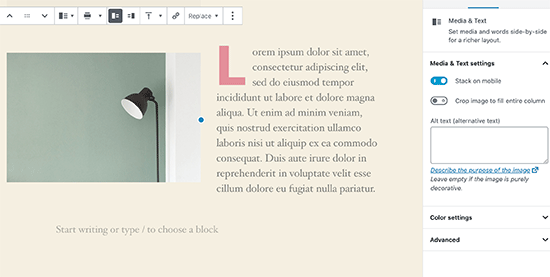
Alternatively, you can also use the ‘Media & Text’ block instead of the image block. This block is made specifically for adding images next to the text.
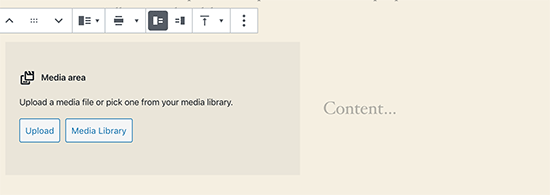
You can then upload an image and text side by side. You can also use the block toolbar to change the image or text side.
3. How to Add Caption below Images?
WordPress allows you to easily add caption for images. After you upload an image, you’ll see the option to add caption right below the image preview.
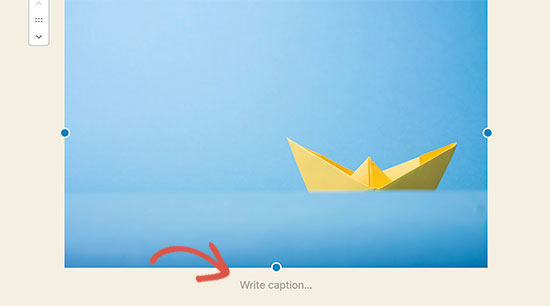
Similarly, you can also add captions to image galleries in WordPress. For more details, see our guide on how to add captions to images in WordPress.
4. How to Display Photos in Columns and Rows?
Often users ask us how to neatly display photos in columns and rows.
Let’s say you want to share photos of a birthday party or vacation photos. You can add them one by one into a post, but this will look like a lengthy list of images.
The better way to group your photos is by creating image galleries.
WordPress comes with a built-in gallery block that allows you to easily add images in rows and columns with thumbnail previews.
Simply add the gallery block to the post editor and select the images you want to upload.
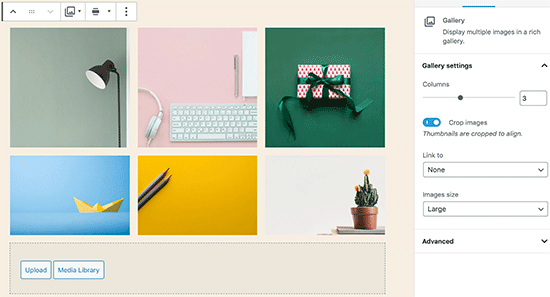
For more detailed instructions see our guide on how to create an image gallery in WordPress.
5. Create Beautiful Responsive Image Galleries in WordPress

You will notice that the default WordPress image galleries lack several features. For instance, they are also not very easy to browse.
If you often upload images and photographs to your WordPress site, then you will need a proper WordPress photo gallery plugin.
We recommend using Envira Gallery. It allows you to easily create beautiful and fully mobile-friendly image galleries on your WordPress site.
The best part is that it adds additional functionality like albums, gallery templates, social sharing, slideshows, watermarking, pagination, password protection, tagging, fullscreen view, and much more.
6. How to Fix Missing Post Thumbnails / Featured Image?
Most WordPress themes allow you to prominently display a featured image with your articles. Here is how to set a featured image in WordPress to avoid missing thumbnails.
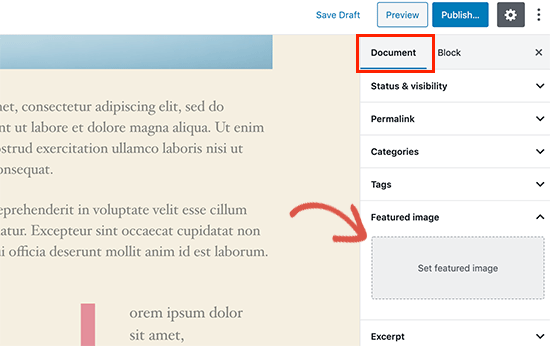
Now, you can click on ‘Set Featured Image’ to upload your post thumbnail. After uploading the image, you’ll be able to see your post thumbnail in the featured image meta box like this:
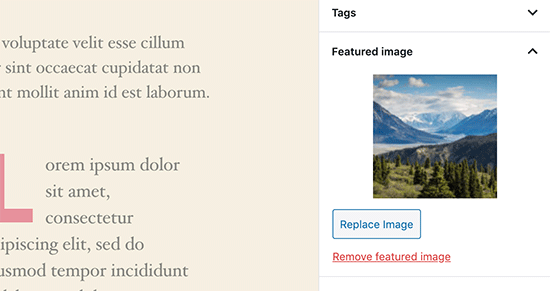
For more details, see our guide on how to add featured image or post thumbnail in WordPress.
7. How to Add Cover Images in WordPress Posts and Pages
Cover images are the wide or full-width images that can be used as a separator between different sections of an article or a lengthy sales page.
They are highly engaging and help users easily scan a page without feeling overwhelmed by too much text.
To add a cover image, you simply need to add the ‘Cover’ block to the content editor.
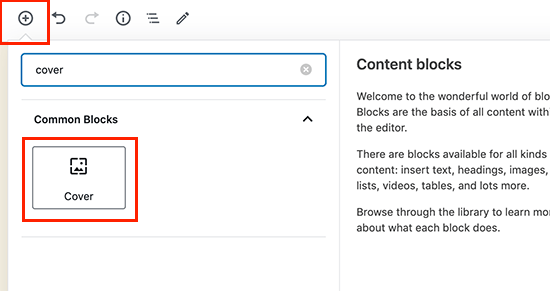
Next, you need to upload the image you want to use from your computer or select one from the media library. If you don’t want to use an image, then you can also select a color background as the cover.
Tip: It is best to use a large image for a better result.
You’ll now see a liver preview of your cover image in the editor. You can change the cover image display options from the block toolbar or using the settings on the right.
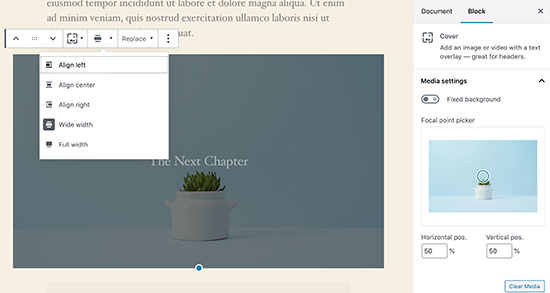
To learn more see our guide on the difference between cover image vs featured image in WordPress and how to use them effectively.
8. How to Fix Featured Image Appearing Twice Issue?
Inserting the featured image inside content is a common mistake made by beginners.
Once you set a featured image, you don’t need to insert it into the post editor along with your post content.
Doing so, will make your featured image appear twice. Once as the featured image, and once as an image inside the post.
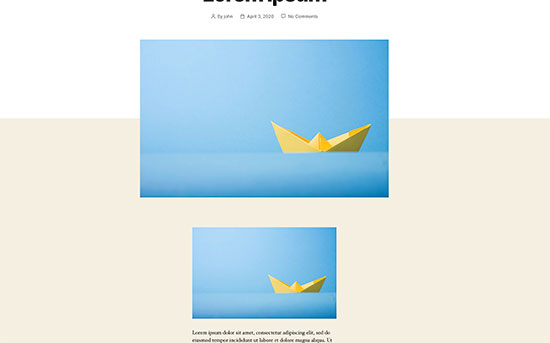
You can add other images in your post, but your featured image goes in the featured image box.
For more details, see our guide on how to fix featured image appearing twice in WordPress posts.
See the 9 other tips in the next article…

